Showing posts with label WIndows xp. Show all posts

Wednesday, June 23, 2010

How to write your desired text in Place of AM/PM besides time in taskbar for Microsoft Windows XP?

How to write yoour desired text in Place of AM/PM besides time in taskbar for Microsoft Windows XP?

Hi Guys,
Today, we will see a small easy trick, but very good to annoy friends and make them weird! we are gonna to change the AM/PM symbol to your desired text of string, i.e you can write your own name too!
So, it will look from this to;to this my Name DAVID!
seems cool huh!

STEPS TO DO THIS!!!

1) Go to Start Menu>>Settings>>Control Panel and Click and open it!

2) If you have pre-settled Category view then just switch to Classic View!


3) Just Click and open the Regional and Language Options!


4) When the new Dialogue box opens Click on the pointed Customize button!

5)A new another Dialogue box will pop up, Clickon the Time Tab as Pointed!


6) after the time tab opens, as shown in below picture, besides AM symbol as pointed, write your name or desired text or whatever you want, and at PM also do so! then click the Apply button and then OK button!


7) And Also click on the Apply Button of Regional and Language Options! and hit OK!


Hip Hip Hurray!
You have done it! Share this cool trick to your friends! and weir them!

Wednesday, December 30, 2009

How to Use Microsoft Paint to crop Images?

You can use microsoft paint to avoid the slow opening of adobe photoshop or any other bulky image editor/processor;

Here, we will learn how to crop an image using the simplest microsoft paint (by default installed with windows package):

1) Open any image by double clicking or open as you wish it, now right click on that image and click on edit

2) The complete will be opened, select the "select tool" that is shown here,


3) Scroll to that area you want to crop and select that area with the specified tool and click on edit menu and select cut or simply press (ctrl+x) combination keys;


and now press ctrl+n and then ctrl+v to paste it in new MS paint document and set the stage and image width so that white space can be accomodated;


ThanX, save that image with the format you want i.e. jpg or bmp....


Wednesday, September 2, 2009

My Computer Won't Shut Down Itself After Installing XP

My Computer Won't Shut Down Itself After Installing XP

http://download.windowssecrets.com/images/wsn/W20090305-XP-Shutdown.jpg

There are a number of users who are noticing that their PC will no longer automatically power down/shut off without pressing the power off button on the computers unlike in Windows Me/95/2000. There could be a number of reasons for this - but the main one seems to be that ACPI is not enabled on the computer or in Windows XP. Here is how to try that out:

  1. Click - Start - Control Panel - Performance and Maintenance - Power Options Tab

  2. Then click APM - Enable Advanced Power Management Support

How To Enable Hibernation

How To Enable Hibernation

https://blogger.googleusercontent.com/img/b/R29vZ2xl/AVvXsEiSoxuaCPVjjH6MVC3xMAs3LQ-P5Nvew25-ohk4yIjkVQX51UYf2KA69lc1YUHAd3predDuiLTV8HVZ0HHTVGQqoAFi3NBisw9tTuqtisBxzhy1GrDJ0kpYj1WMDzET26Dy3AzI3ldvOsc/s320/How+To+Enable+Hibernation+In+Windows+XP+And+Vista+4.JPG
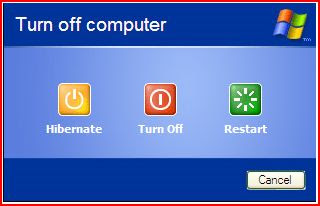
Under Windows 98, Me, or 2000 there was an option in the shutdown dialog box to enter the computer into hibernation (where all the content of the RAM is copied to the hard disk). The shutdown dialog box of Windows XP doesn't offer any longer the hibernation button. Some users may get confused about how to enable the hibernation mode. If this mode is supported by your motherboard (ACPI) you have to do the following:

  1. Click Start and Shut Down,

  2. Point the standby button and maintain the shift key pushed,

  3. A new hibernation button appears: click it while still holding the shift key: voila your PC will hibernate.

On Screen Keyboard

On Screen Keyboard

Want to use an on screen keyboard? Well it is this simple - Click on the start button and select run. Then type in osk in the box and click OK.

How to create a boot disk

How to create a boot disk
http://webpages.charter.net/rriemersma/XpBootDisk.jpg

This is quite simple.
1: Go into MY COMPUTER
2: Have a floppy disk in your drive and then RIGHT click on on the floppy drive and then click on FORMAT
3: You will be greeted with a number of options. The one you need to select is "Create an MS-DOS start up disk".
4: Click ok


Note: This requires up to 5 floppy disks and DOES NOT contain ANY CD-ROM drivers to boot from. A proper CD-ROM boot up disk is going to be release by Microsoft after the Windows XP public release. You can however use you old Windows Me start-up disk if you would prefer, as long as you have not upgraded to an NTFS drive.

XP to directly access WebDAV "internet disks"

XP to directly access WebDAV "internet disks"

cdwinxp3lg6rh.jpg

Windows XP can directly access WebDAV "internet disks" such as Apple's iDisk.

In Internet Explorer, use the "Open..." command, type the name of the WebDAV server you want to access (e.g., http://idisk.mac.com/username) and select the "Open as Web Folder" checkbox. Enter the password when prompted and you're in!

This trick also works on Windows Me and Windows 2000. Interestingly, Windows XP doesn't seem to support iDisk via the "Add a Network Place" command, possible with these other operating systems.

Once set up using the "Open" command, however, the idisk can be accessed by simply double-clicking its icon in the Network Places folder.

Remove Shared Documents

Remove Shared Documents

http://windowsdevcenter.com/windows/2006/08/08/graphics/figure_01.gif

Open Regedit(Start- Run- Regedit) and navigate to HKEY_LOCAL_MACHINE SOFTWARE Microsoft Windows CurrentVersion Explorer My Computer NameSpace DelegateFolders

There will see a sub-key named {59031a47-3f72-44a7-89c5-5595fe6b30ee}. By Deleting this you can remove the 'Other Files stored on This Computer' group.

Enable / Disable Firewall

Enable / Disable Firewall
http://i.ehow.com/images/GlobalPhoto/Articles/4525376/windows-firewall-main_Full.jpg

Open Control Panel and double click on Network Connections. In the new box that appears right click on the Connection and click on the Advanced tab. Check or uncheck the box according to your desire.
Set the Search Screen to the Classic Look
http://des.virtualplastic.net/search.png

When I first saw the default search pane in Windows XP, my instinct was to return it to its classic look; that puppy had to go. Of course, I later discovered that a doggie door is built into the applet. Click "Change preferences" then "Without an animated screen character." If you'd rather give it a bare-bones "Windows 2000" look and feel, fire up your Registry editor and navigate to:

HKEY_CURRENT_USER \ Software \ Microsoft \ Windows \ CurrentVersion \ Explorer \ CabinetState.

You may need to create a new string value labeled "Use Search Asst" and set it to "no".
Never Re-Activate After Installation


http://www.microsoft.com/library/media/1033/windowsxp/images/using/setup/winxp/lets-activate-windows.jpg
If you have to reinstall Windows XP you normally will have to reactivate too. Well not anymore. Just copy wpa.dbl after you activated the first time. It is located in the WINDOWS\system32 folder. Now if you reinstall Windows XP just copy the file back and you're up and running again.

How to Write a Windows XP Driver

How to Write a Windows XP Driver


Source: Microsoft Corporation July 2001

Summary: This document describes the steps you should take to create a Microsoft® Windows® XP driver for your device. To create a Windows XP device driver:

  • Install the current Windows DDK. Read the system requirements and installation instructions in the stand-alone Getting Started HTML file supplied with the DDK.

  • Read Getting Started with Windows Drivers. This document guides you through the planning and decision-making process involved in making a Windows device driver from design through distribution. You should also look through the DDK documentation for device-type-specific information.

The DDK documentation set has the following device-type-specific nodes:

  • Battery Devices

  • Display and Print Devices

  • IEEE 1284.4 Devices

  • Interactive Input Devices

  • Modem Devices

  • Multifunction Devices

  • Network Devices and Protocols

  • Parallel Ports and Devices

  • Serial Ports and Devices

  • Smart Card Devices

  • Still Image Devices

  • Storage Devices

  • Streaming Devices (Video and Audio)

  • Devices Requiring VDDs

  • IDE bus are described in System Support for Buses. Driver development for most device types also requires a strong understanding of Windows operating system fundamentals, which are described in Kernel-Mode Driver Architecture.

  • Look through the driver source code provided with the DDK for a sample that represents your device type. Use the sample code where possible, modifying it for your device's specifics.

  • The sample code can enhance your understanding of Windows XP driver implementation requirements and speed your development time.

  • Compile and build your driver. This should be done using the Build utility and not some other compiler, because the Build utility has certain features that are necessary for driver development.

  • Obtain a checked build of Windows XP, so that you can test and debug your driver using free and checked system builds.

  • The checked build of Windows XP provides extensive kernel-mode debugging capabilities not available in the free build.

  • Create an INF file so that you can install and test your driver.

  • Test and debug your driver. You should use Driver Verifier, a program that puts your driver through a variety of tests, stresses, and deliberate failures in order to test its response and reliability in many extreme situations. You should also use a debugger. Microsoft provides several powerful debuggers that can monitor and debug kernel-mode and user-mode drivers.
    Using Driver Verifier in conjunction with these debuggers, on both the checked and free versions of the operating system, can be a powerful way to test your driver.

  • Provide an installation package so that customers can install devices that use your driver.

  • Submit your driver and installation package to Microsoft so that it can be digitally signed.

There are many resources available to you while developing your driver. The following sites describe some of the support available to you:


Thursday, August 20, 2009

All Keyboard Shortcuts for All Microsoft based Operating Systems-Exclusive Article

Get all Keyboard Shortcuts here which are very useful to us...
http://windows7news.com/wp-content/uploads/2009/03/keyboard-shortcuts.jpg

General Keyboard Shortcuts:
CTRL+C (Copy)
CTRL+X (Cut)
CTRL+V (Paste)
CTRL+Z (Undo)
DELETE (Delete)
SHIFT+DELETE (Delete the selected item permanently without placing the item in the Recycle Bin)
CTRL while dragging an item (Copy the selected item)
CTRL+SHIFT while dragging an item (Create a shortcut to the selected item)
F2 key (Rename the selected item)
CTRL+RIGHT ARROW (Move the insertion point to the beginning of the next word)
CTRL+LEFT ARROW (Move the insertion point to the beginning of the previous word)
CTRL+DOWN ARROW (Move the insertion point to the beginning of the next paragraph)
CTRL+UP ARROW (Move the insertion point to the beginning of the previous paragraph)
CTRL+SHIFT with any of the arrow keys (Highlight a block of text)
SHIFT with any of the arrow keys (Select more than one item in a window or on the desktop, or select text in a document)
CTRL+A (Select all)
F3 key (Search for a file or a folder)
ALT+ENTER (View the properties for the selected item)
ALT+F4 (Close the active item, or quit the active program)
ALT+ENTER (Display the properties of the selected object)
ALT+SPACEBAR (Open the shortcut menu for the active window)
CTRL+F4 (Close the active document in programs that enable you to have multiple documents open simultaneously)
ALT+TAB (Switch between the open items)
ALT+ESC (Cycle through items in the order that they had been opened)
F6 key (Cycle through the screen elements in a window or on the desktop)
F4 key (Display the Address bar list in My Computer or Windows Explorer)
SHIFT+F10 (Display the shortcut menu for the selected item)
ALT+SPACEBAR (Display the System menu for the active window)
CTRL+ESC (Display the Start menu)
ALT+Underlined letter in a menu name (Display the corresponding menu)
Underlined letter in a command name on an open menu (Perform the corresponding command)
F10 key (Activate the menu bar in the active program)
RIGHT ARROW (Open the next menu to the right, or open a submenu)
LEFT ARROW (Open the next menu to the left, or close a submenu)
F5 key (Update the active window)
BACKSPACE (View the folder one level up in My Computer or Windows Explorer)
ESC (Cancel the current task)
SHIFT when you insert a CD-ROM into the CD-ROM drive (Prevent the CD-ROM from automatically playing)
Dialog Box Keyboard Shortcuts
CTRL+TAB (Move forward through the tabs)
CTRL+SHIFT+TAB (Move backward through the tabs)
TAB (Move forward through the options)
SHIFT+TAB (Move backward through the options)
ALT+Underlined letter (Perform the corresponding command or select the corresponding option)
ENTER (Perform the command for the active option or button)
SPACEBAR (Select or clear the check box if the active option is a check box)
Arrow keys (Select a button if the active option is a group of option buttons)
F1 key (Display Help)
F4 key (Display the items in the active list)
BACKSPACE (Open a folder one level up if a folder is selected in the Save As or Open dialog box)
Microsoft Natural Keyboard Shortcuts
Windows Logo (Display or hide the Start menu)
Windows Logo+BREAK (Display the System Properties dialog box)
Windows Logo+D (Display the desktop)
Windows Logo+M (Minimize all of the windows)
Windows Logo+SHIFT+M (Restore the minimized windows)
Windows Logo+E (Open My Computer)
Windows Logo+F (Search for a file or a folder)
CTRL+Windows Logo+F (Search for computers)
Windows Logo+F1 (Display Windows Help)
Windows Logo+ L (Lock the keyboard)
Windows Logo+R (Open the Run dialog box)
Windows Logo+U (Open Utility Manager)
Accessibility Keyboard Shortcuts
Right SHIFT for eight seconds (Switch FilterKeys either on or off)
Left ALT+left SHIFT+PRINT SCREEN (Switch High Contrast either on or off)
Left ALT+left SHIFT+NUM LOCK (Switch the MouseKeys either on or off)
SHIFT five times (Switch the StickyKeys either on or off)
NUM LOCK for five seconds (Switch the ToggleKeys either on or off)
Windows Logo +U (Open Utility Manager)
Windows Explorer Keyboard Shortcuts
END (Display the bottom of the active window)
HOME (Display the top of the active window)
NUM LOCK+Asterisk sign (*) (Display all of the subfolders that are under the selected folder)
NUM LOCK+Plus sign (+) (Display the contents of the selected folder)
NUM LOCK+Minus sign (-) (Collapse the selected folder)
LEFT ARROW (Collapse the current selection if it is expanded, or select the parent folder)
RIGHT ARROW (Display the current selection if it is collapsed, or select the first subfolder)
Shortcut Keys for Character Map
After you double-click a character on the grid of characters, you can move through the grid by using the keyboard shortcuts:
RIGHT ARROW (Move to the right or to the beginning of the next line)
LEFT ARROW (Move to the left or to the end of the previous line)
UP ARROW (Move up one row)
DOWN ARROW (Move down one row)
PAGE UP (Move up one screen at a time)
PAGE DOWN (Move down one screen at a time)
HOME (Move to the beginning of the line)
END (Move to the end of the line)
CTRL+HOME (Move to the first character)
CTRL+END (Move to the last character)
SPACEBAR (Switch between Enlarged and Normal mode when a character is selected)
Microsoft Management Console (MMC) Main Window Keyboard Shortcuts
CTRL+O (Open a saved console)
CTRL+N (Open a new console)
CTRL+S (Save the open console)
CTRL+M (Add or remove a console item)
CTRL+W (Open a new window)
F5 key (Update the content of all console windows)
ALT+SPACEBAR (Display the MMC window menu)
ALT+F4 (Close the console)
ALT+A (Display the Action menu)
ALT+V (Display the View menu)
ALT+F (Display the File menu)
ALT+O (Display the Favorites menu)
MMC Console Window Keyboard Shortcuts
CTRL+P (Print the current page or active pane)
ALT+Minus sign (-) (Display the window menu for the active console window)
SHIFT+F10 (Display the Action shortcut menu for the selected item)
F1 key (Open the Help topic, if any, for the selected item)
F5 key (Update the content of all console windows)
CTRL+F10 (Maximize the active console window)
CTRL+F5 (Restore the active console window)
ALT+ENTER (Display the Properties dialog box, if any, for the selected item)
F2 key (Rename the selected item)
CTRL+F4 (Close the active console window. When a console has only one console window, this shortcut closes the console)
Remote Desktop Connection Navigation
CTRL+ALT+END (Open the Microsoft Windows NT Security dialog box)
ALT+PAGE UP (Switch between programs from left to right)
ALT+PAGE DOWN (Switch between programs from right to left)
ALT+INSERT (Cycle through the programs in most recently used order)
ALT+HOME (Display the Start menu)
CTRL+ALT+BREAK (Switch the client computer between a window and a full screen)
ALT+DELETE (Display the Windows menu)
CTRL+ALT+Minus sign (-) (Place a snapshot of the active window in the client on the Terminal server clipboard and provide the same functionality as pressing PRINT SCREEN on a local computer.)
CTRL+ALT+Plus sign (+) (Place a snapshot of the entire client window area on the Terminal server clipboard and provide the same functionality as pressing ALT+PRINT SCREEN on a local computer.)
Microsoft Internet Explorer Navigation
CTRL+B (Open the Organize Favorites dialog box)
CTRL+E (Open the Search bar)
CTRL+F (Start the Find utility)
CTRL+H (Open the History bar)
CTRL+I (Open the Favorites bar)
CTRL+L (Open the Open dialog box)
CTRL+N (Start another instance of the browser with the same Web address)
CTRL+O (Open the Open dialog box, the same as CTRL+L)
CTRL+P (Open the Print dialog box)
CTRL+R (Update the current Web page)
CTRL+W (Close the current window)

Guide to Slipstreaming Service Pack 2

Guide to Slipstreaming Service Pack 2
http://www.geekgirls.com/images/slip02.jpg

Here is the Guide to Slipstreaming Service Pack 2..

Note: All images are hosted with ImageShack.

• This guide will allow you to sucsessfully install Service Pack 2 on the original (gold) code of Microsoft Windows XP.
• The version of Windows you have purchased/downloaded does not matter as far as slipstreaming (they're all the same anyway).

Things you need:
• Microsoft Windows XP (duh :P)
• Service Pack 2:
click here to get it....

• Windows XP Boot sector click here to get it.
• Nero Burning Rom (find it on SoD)

Step One
Insert the Microsoft Windows XP CD into your CD-ROM drive, and create a new folder on your hard-drive labelled "CD".

Copy all of the files from the Windows XP CD to the "CD" folder.


Step Two
Download Service Pack 2 and place it within the root of your hard-drive.
Ex: C:\ D:\ etc..


Step Three
Go to Start -> Run and type in "F:\WindowsXP-KB835935-SP2-ENU.exe -s:F:\CD" (depending on where you put the folder)

The actual command is -s:drive:\folder


Step Four
The Service Pack 2 updater will automatically slipstream Service Pack 2 into your "CD" folder.


Step Five
If you browse back to the CD folder, you'll notice that new folders and files appeared from the SP2 update. At this point, you can include any software you wish onto this CD, but make sure that the size of the folder does not exceed the media you are burning on. If you're not sure, a regular CD is 700 megabytes.


Step Six

Go to Start and Search for files and folders. Go to all files and folders, and type in "wpa.dbl". This is the activation file for your current installed version of XP. Make a copy of the file and paste it into your CD folder.


Step Seven
Open up Nero Smartstart, and click on the icon that looks like two people. This turns the program into "professional mode". Search for create a bootable CD. Click on it, and make sure that your settings agree with the following picture; also make sure that you downloaded the Windows XP boot sector.


Step Eight
Continue onto the next tab, and make sure that your settings agree with the picture:


Step Nine
In this step, you can label your CD whatever the hell you want. I recommend WXPSP2_EN.


Step Ten
Go to "new" and locate your CD folder. Drag all of the files in the CD folder to the compilation window on the right, and nero will calculate how much disk space was used. If it exceeds 700 MB, get rid of some programs that you added to the CD. If you didn't add anything; just push burn.


Step Eleven
Make sure that your settings check with the picture:


Step Twelve
Just push burn, and that's it! Congratulations, you just made a bootable Win XP CD with SP2 slipstreamed!

Saturday, August 15, 2009

Delete undeletable files (XP)

Delete undeletable files (XP)

Undeletable files are data files (e.g., avi, doc, etc.) that Windows Explorer will not let you delete even if you close all your programs and/or reboot.

First Method: Unlocker

- Download and install Unlocker (Free - 189KB).

Second Method: Process Explorer

- Download (Free - 77KB - Scroll down to the bottom of the page) and start Process Explorer.
- Close Windows Explorer.
- Select Explorer.EXE in the top pane.
- Look for the undeletable file in the bottom pane.
- Right-click the file, and select Close Handle.
- Close the program, and delete the file in Windows Explorer.

The seach feature does not work with file names, but it does with folder names.

Third Method: CMD

- Close all open programs.
- Open a command line window: Start > Run > CMD.
- Kill Explorer.exe: Ctl-Alt-Del > Processes, select Explorer.EXE, then click End Process.
- Delete the file in CMD.
- Restart Explorer.exe: Ctl-Alt-Del > File > New Task, then type Explorer.exe, and click OK.

MMC - Microsoft Management Console Tips Tricks- Full Expaination-Exclusive Article

MMC - Microsoft Management Console

A comment I frequently hear is users wishing there was one central location where they could go to perform the majority of the administrative tasks that are a part of life with a computer. Just remembering all the locations where these tasks can be accomplished is no small feat in itself. Microsoft must be keeping it a secret or user curiosity isn't what it once was, but such a place does exist; Microsoft Management Console. In Microsoft's own words, "Microsoft Management Console (MMC) hosts administrative tools that you can use to administer networks, computers, services, and other system components." That's all well and good, but what does it mean in real life? Basically, it means that you can create a customized set of tools and group them in a 'console' that is easily accessible without having to search through different locations to find one particular setting or group of settings.

Microsoft Management Console Basics

The first thing to understand is that a Microsoft Management Console is a host for an administrative tool called a snap-in. A snap-in is actually an Active-X module that is used to perform a specific function, but without a snap-in a console is useless. It's sole purpose is as an application to hold the snap-ins you select and provide a mechanism for them to become functional. Each console is created from either a single snap-in or combination of snap-ins. Once a basic console has been created it's up to you to add snap-ins appropriate to the intended use of the console. To illustrate, use the Run command in Start Menu to open the Event Viewer Console (eventvwr.msc) and the Computer Management Console (compmgmt.msc). The Event Viewer Console will contain only the event viewer snap-in. The Computer Management Console also contains the same event viewer snap-in under the category System Tools. A comparison of Event Viewer in both locations will show they contain identical data. The event viewer snap-in can be used by itself to construct a single purpose console, or as a component part of a multiple purpose console such as Computer Management. Whether one snap-in or multiple snap-ins are used, once they are added to the host and saved with a .msc extension it becomes a functional Microsoft Management Console.

I mentioned the Event Viewer and Computer Management consoles. Both are pre-configured consoles that come with Windows XP. In addition there are quite a few others that are standard issue with XP. I've listed them in the table below with their everyday name and the file name that is used to launch them using the [Start] [Run] command.

Certificates certmgr.msc
Indexing Service ciadv.msc
Computer Management compmgmt.msc
Device Manager devmgmt.msc
Disk Defragmenter dfrg.msc
Disk Management diskmgmt.msc
Event Viewer eventvwr.msc
Shared Folders fsmgmt.msc
Group Policy gpedit.msc
Local Users and Groups lusrmgr.msc
Removable Storage ntmsmgr.msc
Removable Storage Operator Requests ntmsoprq.msc
Performance perfmon.msc
Resultant Set of Policy rsop.msc
Local Security Settings secpol.msc
Services services.msc
Windows Management Infrastructure (WMI) wmimgmt.msc
Component Services comexp.msc

As you can see from the table the pre-configured consoles that come with XP cover a wide array of tasks and services. Does it really make sense to create custom consoles when all of these are already available? Actually, it does. It's unlikely that any of the pre-configured consoles will precisely match the tasks you are faced with on a regular basis. Modifying the pre-configured consoles or creating new ones allows precise tailoring of the console to a specific task or group of tasks. This can eliminate having to move between different locations to accomplish tasks while helping to prevent overlooking parts of a specific task. In situations where administrative tasks are performed by multiple users, creating custom consoles related only to the specific task they perform lessens the chance of error or accessing areas that should remain unavailable. Additionally, since some consoles can be configured to administer remote as well as local computers, customizing a console can restrict access when required.

Launching A Microsoft Management Console

As shown in the table above, Microsoft Management Consoles use the extension .msc which stands for Microsoft Common Console Document (MCCD). By default, files which use the .msc extension open with the application Microsoft Management Console (MMC). Via the file association, simply clicking on a MCCD opens it in the MMC application. If you are more of a command line type user, typing the document name will accomplish the same result. Either of these methods opens the console in whatever mode it was saved in previously, which leads into the discussion of modes: what is a mode and what modes are available?

A mode as it relates to a Microsoft Management Console is really just another way of defining what type of access is allowed. It's broken down into two basic forms: Author Mode and User Mode, with User Mode being further broken down into three categories; full access, limited access - multiple window, and limited access - single window. Setting modes is accomplished via [File] [Options...] and using the Console Mode drop-down list box. The descriptions of each mode, shown below, were taken directly from the Options Property Sheet in MMC.

Author Mode: Grants users full access to all MMC functionality, including the ability to add or remove snap-ins, create new windows, create taskpad views and tasks, and view all portions of the console tree.
User Mode - Full Access: Grants users full access to all window management commands and to the console tree provided. Prevents users from adding or removing snap-ins or changing console properties.
User Mode - Limited Access, Multiple Window: Grants users access only to the areas of the console tree that were visible when the console was saved. Users can create new windows but cannot close existing windows.
User Mode - Limited Access, Single Window: Grants users access only to the areas of the console tree that were visible when the console was saved. Prevents users from opening new windows.

Included on the Options Property Sheet are two additional options, their availability dependent on which mode was selected. If Author Mode is selected these options are grayed out. They are available for any of the User Mode selections.

Do Not Save Changes To This Console: Allow or deny the user the ability to save changes to the console.
Allow The User To Customize Views: Allow or deny the user the ability to add windows rooted on items in the console.

If it's necessary to run a User Mode console in Author Mode, two alternative methods of opening a console in Author mode are available.

  • Navigate to the .msc file in Windows Explorer, right click the file and click [Author].

  • At a command prompt, type yourconsolefilename.msc /a where yourconsolefilename is the name of the console file.

By default, the Computer Management console that is standard in Windows XP opens in User Mode - Full Access. Since this mode does restrict a few options, the screen capture below shows Computer Management Console opened in Author Mode using the first alternative method listed above. It's going to be used as the basis for a discussion of the parts of a console.

I'm not going to go into a ton of detail about the console for this particular article, but a few observations and notes you may find useful are below.

  • The majority of the consoles are divided vertically into two panes. The left pane is the console tree and the right is the details pane. They can be sized to suit by dragging the divider bar. The detail pane naturally reflects whatever item is selected in the console tree pane.

  • A standard Windows menu bar, when fully displayed, consists of [File] [Action] [View] [Favorites] [Window] and [Help] sections. The [View] menu contains a [Customize...] option for altering the visible portions of the console.

  • The Toolbar is directly below the Menu Bar. Its contents will change depending on the selection in the console tree. In the example above, it contains a series of four icons for controlling the Alerter Service that is highlighted in the details pane, allowing it to be started, stopped, paused, or restarted.

  • Notice in the top of the console tree pane, Computer Management is followed by (Local), indicating that this console is controlling the local computer, or the actual physical computer you are sitting at while working. The majority of the preconfigured XP consoles are set by default to work on the local machine. If a user has the appropriate permissions, consoles can be used to administer remote computers. To change from the local computer to a remote computer, right click on Computer Management (Local) and click [Connect To Another Computer...] to open the Select Computer Property Sheet shown below. If you know the name of the computer, enter it in the box or use the [Browse...] button if you aren't sure of the name.

  • A console can also be opened to manage a remote computer by using the command line syntax consolename.msc /computer=computername where consolename is the name of the console and computername is the name of the remote computer. One danger of the command line method is trying to open a console that doesn't support remote computer administration. No error message is displayed warning that the console was not able to connect to the intended remote computer. Always check the snap-in in the console tree to verify you are connected to the intended computer.

  • How you actually work with a console is a matter of personal preference, but the two primary methods are via [Action] on the Menu Bar or using the Context Menu available via a right click on the item either in the tree or details pane. The easiest method, and the one that ensures that all available options will be visible, is to use the context menus.

  • The details pane behaves in a manner consistent with Windows Explorer. Arrange it to suit your working style by rearranging, sizing, sorting and hiding items until it presents the information in a manner suited to your individual taste.

  • Finally, if you need to export data for use in a different format check the context menu for the [Export] command. Lists can be exported in both tab and comma delimited text file formats.

Building A Custom Microsoft Management Console

Once you've spent some time working with the pre-configured consoles that ship with XP and exploring the options they offer, if you find they suit your work habits and needs, stick with them. However, I suspect that from time to time you're going to wish for one more item here or find and extra item you never use. When that happens, it's time to think about building a custom console exactly suited to your needs.

There are basic steps involved in building a console. I've listed some of the more common items below in two groupings. The first items listed below are absolutely essential to basic console functionality. The second grouping are optional items, used to make your work experience easier or to place restrictions on users access.

The Absolute Essential Items For A MMC
  • Launch MMC: This creates the basic console which is used for all subsequent operations. To launch MMC and create the console:

Click [Start] [Run], type mmc and click [OK] to create a MMC with no snap-in.

  • Add A Snap-In To The Console: As I was typing this section I got to thinking about this step. In truth, you don't have to add a snap-in to the console to create it. However, if you don't add a snap-in, the console is useless, so unless you just like opening a bare console and staring at it - well, you get the idea. To add a snap-in to the console:

Click [File] [Add/Remove Snap-In...]
or
Use the [Ctrl+M] key combination to open the Add/Remove Snap-In Property Sheet shown below.

While you are adding the snap-ins, you may encounter items called extensions. Extensions are really nothing more than a sub-snap-in, or a snap-in for a snap-in, if you will. Some snap-ins have all the possible extensions selected by default while others allow adding them selectively. To see if extensions are available, select the snap-in that was added on the Add/Remove Snap-In Property Sheet and click the [Extensions] tab at the top of the sheet. Select the extensions you want to add and click [OK].

  • Save The Console: From the Menu Bar, click [File] [Save As] and type a name for the console. Bear in mind that the name you use here will appear in the title bar of the console, so unless you like "I Finally Made A Damn Console" as its name, I'd suggest something a bit more descriptive of its intended purpose or use.

That's all there is to it. You've built a custom console and it will be available for your use from this point forward. When I first started using consoles I did exactly what was described above and kept it as a shortcut on my desktop. Whenever I needed to perform a task that involved one of the pre-configured consoles I added the snap-in to my custom console. In very short order I had a custom console tailored to my specific needs. The more you work with consoles you'll come to realize just how useful they are, especially when you develop specialty consoles for other users and unique support situations.

The Optional Items For A MMC
  • The Console Tree: It's not essential to display the console tree, especially if you use a single purpose console, but in most situations it makes using the console much easier and provides a visual anchor to make navigation easier. The Toolbar contains an icon to toggle the tree on and off which is quite useful with some snap-ins to increase the viewable area in the details pane.

  • Folders: Imagine what Windows Explorer would be like without an organizational structure of folders and subfolders. It would be a nightmare to navigate and find files. The same holds true for consoles. The Computer Management snap-in is an excellent example of how folders can aid in providing structure to your console as it grows. To add folders to a console:

Click [File] [Add/Remove Snap-In...]
or
Use the [Ctrl+M] key combination to open the Add/Remove Snap-In Property Sheet
Select the parent for the new folder using the [Snap-Ins Added To:] dialog box.
Click [Add] and select [Folder] from the list of snap-ins that is displayed. Click [Add].
Repeat if you want more folders under the same parent, or click [Close] when finished.
Select a new parent folder if you want to add additional subfolders or [OK] to return to the console tree.
Right click each new folder, choose [Rename] and enter an appropriate name.

  • Taskpad Views: It's much easier to use a taskpad view than it is to describe a taskpad view, but basically it's a separate view of a detail pane of a console. Taskpad views can contain shortcuts located within a console or to items totally removed from the console. The easiest way to look at a taskpad view is to think of it as an interactive help screen with all the associated parts and pieces to perform a task but without any of the extras tossed in that might confuse a user who isn't experienced in using Microsoft Management Consoles. Taskpad views are created using the New Taskpad View Wizard. Select the location in the console tree where you want to create the view, right click and select [New Taskpad View...].

  • Custom Views: The [Customize...] command is available from the View menu on the Menu Bar. Selecting it will allow you to control all the different visual aspects of the current console. Select the items you find useful and hide the parts of the console that are distracting.

  • Favorites: The favorites menu in Microsoft Management Console works exactly like favorites in Internet Explorer except it relates to the current console. Click [Favorites] and add the current selection for quick future access to any part of the console. The [Organize Favorites...] command is also available from the Favorites Menu if the list of favorites becomes unwieldy.

  • New Window From Here: This can be used to open a child window based on the current console tree selection. One example would be to create a New Window From Here to display both Users and Groups windows at the same time in a console. The windows can be tiled to allow viewing both simultaneously.

A Few Final Words About Microsoft Management Consoles

The real value in using consoles if you are on a single computer is the ability to tailor one console to your own preferences. Spend some time exploring the snap-ins, discarding those parts you never use and adding others as your experience grows. In a multi-user/multi-computer situation, creating consoles tailored to specific users and responsibilities increases efficiency and helps guard against security problems and administrative errors. Whatever the situation, once you spend some time getting past the initial learning curve you'll find them quite useful.

Install Backup on Windows XP Home Edition

Install Backup on Windows XP Home Edition

Users of XP Home Edition that have tried to back up their systems may have been surprised to find that the Backup utility is not included in the default installation of Windows XP Home Edition. No Backup icon is present on the Start menu in Windows XP Home Edition, nor is Backup listed in Add Remove Programs for Windows XP Home edition. No mention of the utility is made anywhere during the installation, but it is included with Windows XP Home Edition. It's just necessary to do a manual install to prepare it for use.

To Manually Install the Backup Utility
  • Insert the CD Rom and navigate to CD-ROM Drive:\VALUEADD\MSFT\NTBACKUP

  • Double-click the Ntbackup.msi file to start the wizard that installs Backup

  • When the wizard is complete, click Finish.

Uninstalling Windows from Command Prompt

Uninstalling Windows from Command Prompt

One option included in Windows XP is the ability to uninstall XP if you performed an upgrade from Windows 98, 98SE, or Windows Me. The standard method of removing XP is achieved by booting into XP normally and uses the Add/Remove Programs tool in Control Panel. If you are unable to start XP normally, the second option is to load XP in Safe Mode then use the same tool. If you are unable to boot normally or boot into Safe Mode, XP can be removed by uninstalling from a Command Prompt. The procedure is as follows:

Important Note: This procedure is available only if a successful image of the previous operating system was created during the XP upgrade.

Start the computer to Safe Mode with Command Prompt.

At the command prompt, type
cd\, and then press ENTER.

Type cd\windows\system32, and then press ENTER.

Type osuninst.exe, and then press ENTER.

On screen instructions will guide you through the uninstall process to revert to the previous operating system.

This procedure can only be performed by users logged on as Administrator or a user with administrative rights.

Add Your Photo to the Start Menu

Add Your Photo to the Start Menu

At the top of the Start Menu there is a graphic depicting the user signed onto the computer. The pictures are 48 x 48 bitmap images. Create any BMP, GIF, JPG or PNG image and add it to the folder located at:


C:\Documents and Settings\All Users\Application Data\Microsoft\User Account Pictures\Default Pictures

Best results are obtained by using a square image.

How to Change the Name of the Start Menu Button

How to Change the Name of the Start Menu Button


1. Windows 9x

The name of the Start Menu button is in explorer.exe. Since Windows won't let you modify the file, you must make a copy of it, modify the copy, then boot into DOS and replace the original file with the modified version. Make sure you back up explorer.exe before you start.

Load the file into an hexadecimal editor, and search for the following hexadecimal bytes:
53 00 74 00 61 00 72 00 74 (= "Start"). You will find these bytes more than once, but you should only have to change the last occurrence.

Replace S, t, a, r, t with whatever you want, but leave the 00's in. If your new string is shorter than "Start", you can either overwrite the extra letters with blanks, or you can change the length byte. Just before the first byte (53) there is a 00 and before it a 05: this is the string's length. If the new string is "New" then this byte should be set to 03 -- this way the Start Menu button will not be longer than the string. The new string must not be longer than the original one, else Windows will not work.

Note: The icon is in user.exe

2. Windows XP

You can use the method described above if you want: In the US version of Windows XP Pro, the string is at 0EE36F (Classic-style button) and 0EE096 (XP-style button). But instead, we are going to use Resource Hacker (542KB).

2.1. Bypassing Windows File Protection

1. In Windows Explorer, click Tools, Folder Options, then View. Uncheck Hide protected operating system files and check Show hidden files and folders.

2. There is a file named filelist.xml in \windows\system32\Restore. Right click the file, then click Properties, and uncheck Read-only. Open filelist.xml in Notepad, and add the line shown in red below, then save the file and close Notepad.


%systemroot%\explorer.exe
%windir%\system.ini
%windir%\tasks\desktop.ini
%windir%\win.ini
*:\AUTOEXEC.BAT
*:\CONFIG.MSI
*:\CONFIG.SYS
3. In \windows\system32\dllcache, you will find a backup copy of explorer.exe. Rename it to explorer.bak.

2.2. Changing the name of the Start Menu button

1. Run Resource Hacker, and open \windows\explorer.exe

2. Click String Table > 37 > 1033 (XP-style button)

3. Replace "start" with whatever you want ("hello", in the picture above)

4. Click the Compile Script button.

Repeat steps 3 and 4 for String table > 38 > 1033 (Classic-style button)

5. Save the file (File>Save). Hit Cancel then Yes when Windows File Protection pops up.

Note: If an error message pops up when saving the file, kill explorer.exe (Clt-Alt-Del > Processes > explorer.exe > End Process > File > New Task), repeat step 5 (save the file in Resource Hacker), and restart explorer.exe (Clt-Alt-Del > Processes > explorer.exe > End Process > File > New Task > explorer > OK).

2.3. Changing the icon of the Start Menu button
1. Click Bitmap > 143 > 1033

2. Click Action > Replace bitmap > Open file with new bitmap (the new picture must be 25x20, and have 16 million colors).

3. Select a picture file, click Replace, then save (File>Save) your work. Hit Cancel then Yes when Windows File Protection pops up.

4. Close Resource Hacker

If you do not want to reboot to see your new button, kill then restart explorer.exe (Clt-Alt-Del > Processes > explorer.exe > End Process > File > New Task > explorer > OK)

Links

EasyHits4U.com - Your Free Traffic Exchange - 1:1 Exchange Ratio, 5-Tier Referral Program. FREE Advertising!
 

Comment/Chat

Followers

This Site is Designed, Developed and Maintained by Engineer Jokhio Salahuddin Kohistani
©Copyright 2009-All Rights Reserved.